How to repair a thread

Damaged and pulled threads can be an annoying inconvenience, especially a stripped spark plug thread. They can also be expensive if the equipment you are working on is vital or difficult to replace. But there are now systems with which you can repair even completely destroyed threads quickly and at a reasonable cost, so saving time and money. Existing undamaged threads can also be significantly strengthened using these types of repair systems.

Resurrect your old mower by repairing the spark-plug cylinder thread
By Gavin Norrington,
Technical Manager, Patience & Nicholson 

The indestructible iron horse

Damaged and pulled threads can be an annoying inconvenience, especially a stripped spark plug thread. They can also be expensive if the equipment you are working on is vital or difficult to replace. But there are now systems with which you can repair even completely destroyed threads quickly and at a reasonable cost, so saving time and money.
Existing undamaged threads can also be significantly strengthened using these types of repair systems. This is especially helpful if you are making anything out of softer materials such as aluminum or brass. Most modern motor vehicles with aluminum sub-frames, engine components, and so on include thread inserts in their manufacture to increase fastening strength. Applications for this type of product are quite extensive. The aim of this article is to show you how to repair a thread in a couple of common situations many sheddies will have come across.
The first repair is one that anybody who services their own motor vehicle or power equipment such as lawnmowers at home would have been likely to have encountered, this stripped spark plug thread. There must be many valuable or otherwise useful pieces of equipment out there in shed land that could be put back into serviceable condition with this simple repair.
The second repair is a Keysert insert repair. This repair is used where the entire thread and surrounding parent material has failed. This repair is a little more complex but with care, it is still possible to carry out this type of repair with basic equipment found in the typical shed.

Tap with grease applied to catch swarf
Starting the re tapping by hand
Tapping the thread

Spark plug repair 
For this repair, we have chosen the classic old lawn mower with a damaged spark plug thread. Ideally, the engine would be stripped down to the cylinder barrel. But this repair can be successfully completed without doing this.
Most engineering merchants will stock or will be able to supply a spark plug repair kit of the correct size (either 10mm or 14mm) with everything included to complete the repair.
First of all, mount the mower on a bench in a convenient position, ideally in a vice with the spark plug hole pointing down vertically. This is to help prevent swarf from falling into the cylinder barrel. If this isn’t convenient, a good trick is to use grease on the end of the tap to collect all the swarf.
Next with the tap provided in the kit (you will need a tap wrench) carefully start cutting the new thread in your spark plug hole. Ensure the piston is at the bottom of its stroke. You will notice this tap has two different-sized threads on it. The first will match the original thread size in your spark-plug hole. The second is the thread for your insert to go into.
With the provided thread-insert tool, wind in the insert until it is flush with the top of the spark-plug hole. You may notice that when the insert was being wound in that its diameter reduced. This reduction in diameter creates a radial force that locks the insert in so that it cannot unwind once it is in place.
With a pair of long-nose pliers, break off tang or small metal lug used for purchase while you drive the insert in. Take care not to drop the tang into the cylinder. Carefully clean off any remaining swarf and grease.
You are now ready to refit your spark pug and fire up your resurrected lawn mower! Footnote: the brand of repair kit that has been used here uses stainless steel inserts, so this not only repairs the thread but strengthens it by up to 60 percent. 

Completed tap. Note the swarf captured by the grease
Thread repair ready for insertion
Inserting the thread
New insert in place. Note the drive tang
Snapping off the drive tang
Good as new!

Keysert repair
Fix an engine block head-stud hole

Drilling out the old thread

For the Keysert repair, we have again selected a common application which is an engine block with a torn-out head-stud hole.
This is a perfect type of repair for a Keysert. Keysert inserts come in many materials and different sizes for both internal and external diameters. Your local engineering merchant will know where to procure them.
Keyserts come in small quantity packs and do not include correct taps and drills. You will have to buy these as extras. 
For this repair, you will need to have your engine fully stripped down.
Lifting equipment, a sturdy bench, and a drill press are probably the order of the day for this operation.
Carefully drill out the hole to the required size and tap in the same way as the above.

Starting the tap
Tapping the hole

Screw in the Keysert until it is flush with the top of the hole. You will notice four square-shaped pins protruding from the top of the installed Keysert. These are locking pins.
With a ball pein hammer, carefully hammer these down until they are flush with the top of the hole.
You can now drill and tap the Keysert to the correct size for your stud and carry out any machining required. These are just two of the many repairs that can be carried out with these types of repair systems. Please refer to your local engineering merchant for further details on what is available.

Keysert nearly bedded
Knocking home the locking pins
The new thread tested for fit

Share:

More Posts

All hands to the tanks

The call goes out. The volunteers pour into the military camp at Waiouru in the centre of the North Island. The only war, though, is going to be on rust, handbrake cables,
driveshafts, seized brake systems, the battered cylinders of tank engines and the ongoing tussle to turn out new truck engine parts.
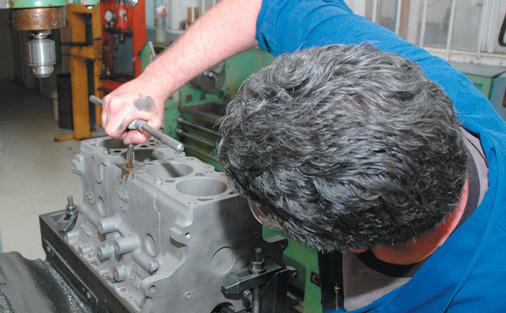
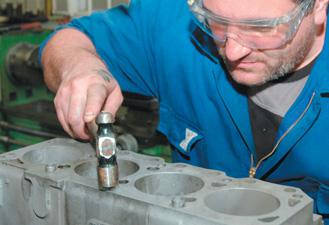
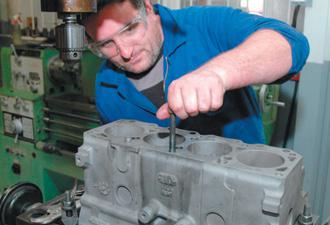
Here is a group of willing sheddies who meet about once every six weeks under the keen oversight of George Pycraft. Their job: to continue repairing the heritage vehicles of the Army Museum at Waiouru.
Their “shed” is a group of four storage sheds housing 85 vehicles in various states of repair. They are as diverse as tanks, the 24-tonne M41 Walker Bulldog, the Centurion, and Valentine tanks (the latter still in World War II Pacific theatre camouflage), a 1941 Canadian Pattern Chevrolet gun tractor, an MB Jeep still wearing its 1942 Long Range Desert Group livery, an M113A1 Armoured Personnel Carrier (APC) painted in UN colours and of the type used in Bosnia, a 1943 Ford F30 truck, a 39-inch searchlight and an M816 recovery wrecker truck made by American Motor Corporation in 1969.
Pycraft, the museum’s Assistant Curator – Technology, says with the help and dedication of the museum’s volunteers they are slowly coming closer to having a complete running collection of heritage vehicles.

A weighty subject

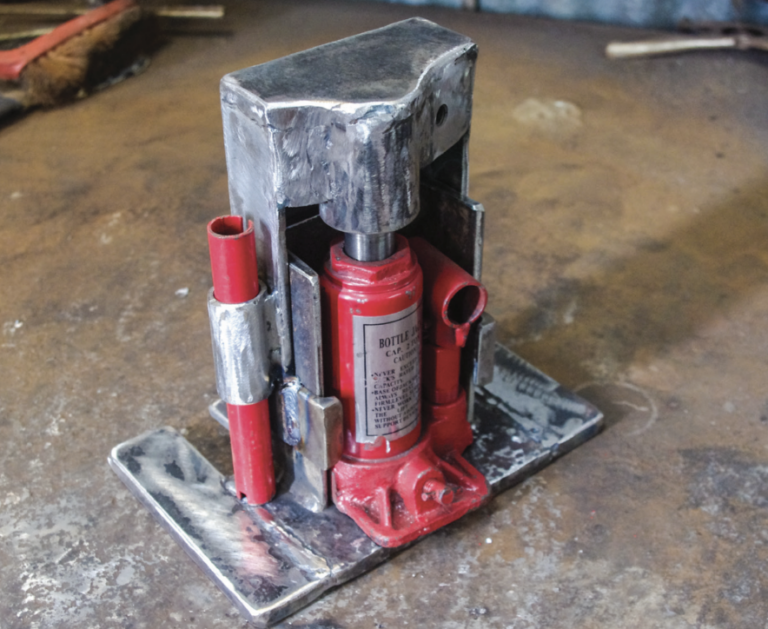
One problem with working alone in the shed and having a liking for large pieces of Victorian cast iron is the difficulty of safely moving or lifting them.
They can be moved with load skates and pipes as rollers, but how do you lift the weight onto the rollers? Trying to push down on a crowbar while arranging pipe rollers under a machine is inviting trouble. A toe jack allows you to lift and hold the weight in the air as you arrange the rollers and put in safety blocks. It is not intended for great weights or high lifts due to stability, but it allows you to lift the weight.

From armour to fighter

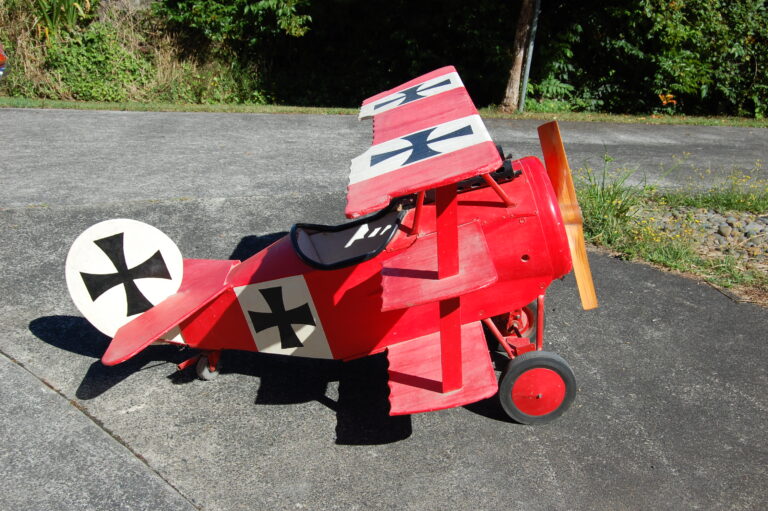
An unassuming garage in the Hunua Ranges south of Auckland is the current shed of Gordon Turner and home to his latest project – a full-sized replica cockpit of a Messerschmitt Bf 109E fighter plane. Made from plywood, timber and aluminium and five years in the making so far, it will never take to the skies. But it is eventually intended to become a flight simulator, giving the ‘pilot’ a realistic experience of flying one of World War Two’s most famous aircraft.