

Building a dead man’s switch

Routers, power and cut-off saws, as well as angle grinders, can all inflict very nasty injuries in a fraction of a second. I can still remember nearly breaking my wrist many years ago when a heavy electric hand drill, fitted with a one-inch drill bit, decided it was time for me to revolve instead of it! A foot- operated cut-off switch would have been just the ticket on that occasion. The dead man’s switch, as I will call it, is a simple device fitted in between the power supply and the operating equipment that requires a foot kept on it at all times for power to be supplied from the source to the equipment. As it will undoubtedly spend a lot of its time on hard floors and possibly uneven surfaces, it needs to be robust as well as big enough to accommodate your foot comfortably. It should also be rugged and well protected from the scuffs and knocks it will undoubtedly suffer over the years.

Using this safety switch in conjunction with a variety of workshop tools will make their operation safer and more user-friendly
By Mark Beckett
Photographs: Mark Beckett

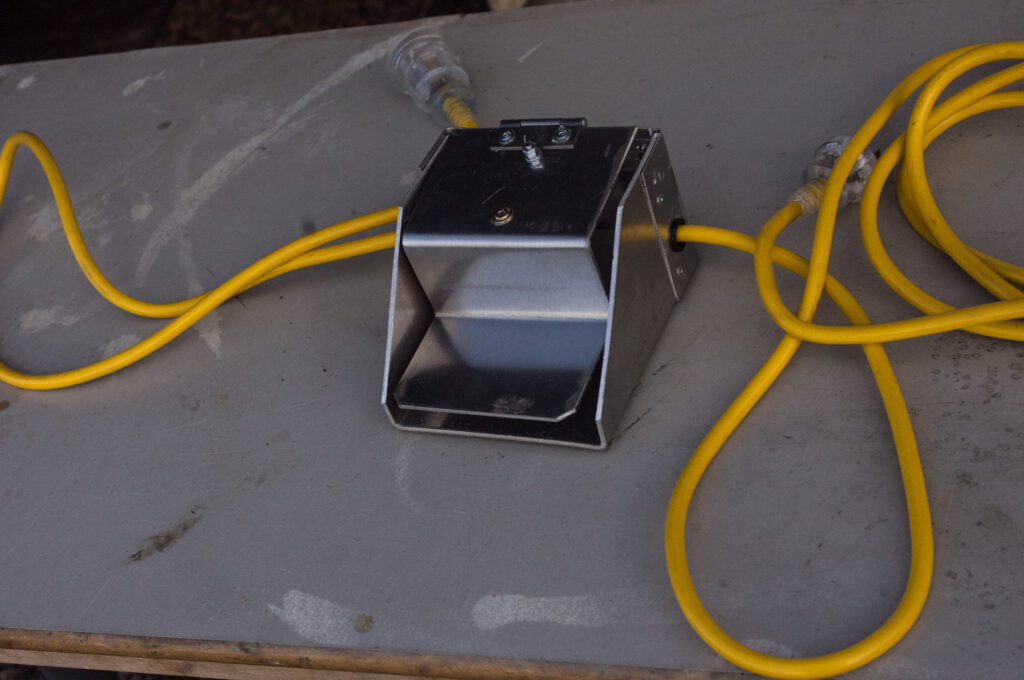
The completed Deadman's Switch

Routers, power and cut-off saws, as well as angle grinders, can all inflict very nasty injuries in a fraction of a second. I can still remember nearly breaking my wrist many years ago when a heavy electric hand drill, fitted with a one-inch drill bit, decided it was time for me to revolve instead of it! A foot- operated cut-off switch would have been just the ticket on that occasion.
The dead man’s switch, as I will call it, is a simple device fitted in between the power supply and the operating equipment that requires a foot kept on it at all times for power to be supplied from the source to the equipment.
As it will undoubtedly spend a lot of its time on hard floors and possibly uneven surfaces, it needs to be robust as well as big enough to accommodate your foot comfortably. It should also be rugged and well protected from the scuffs and knocks it will undoubtedly suffer over the years.

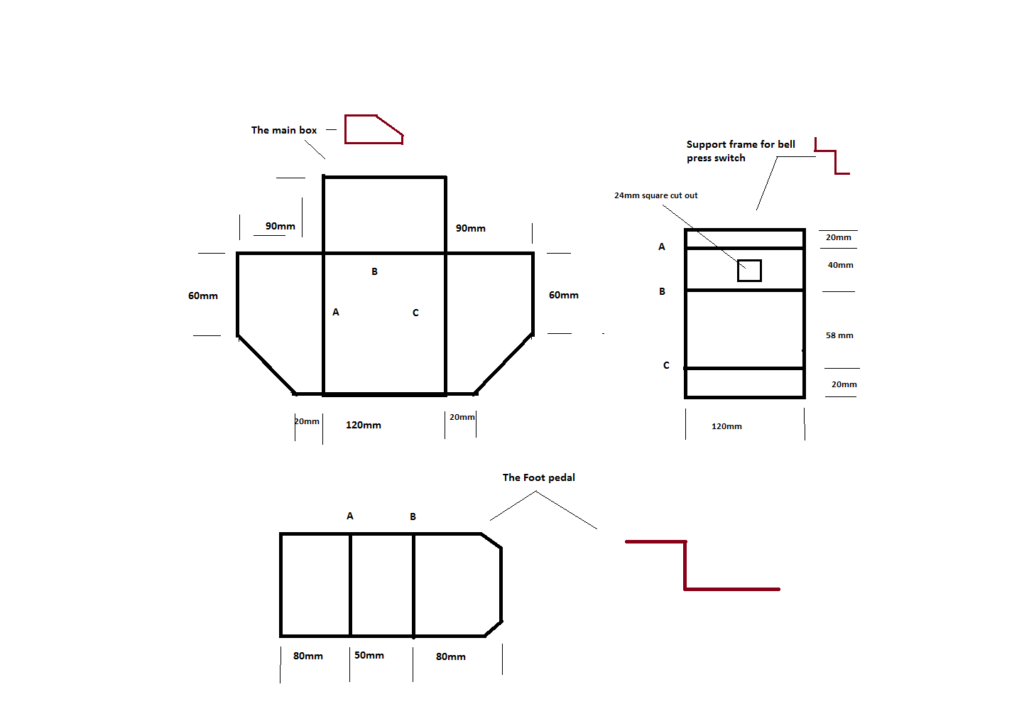
Diagram 1

The simplest approach
The simplest and, in my opinion, probably the most cost- effective way to build it was to purchase a heavy-duty workshop extension lead, cut it, and install the dead man’s switch. The 5-metre lead I chose also happened to be bright yellow, making it easier to find amongst the tools and machinery, and less likely to trip over. This is important because if it’s easy to locate, chances are it will be used regularly, adding to overall safety in your shed.

Most electric hand tools have reasonably long leads, so deciding where along its length to cut the extension lead boils down to guesstimating the average distance between your foot and the hand-held tool with a bit extra so that you can easily put the tool on the bench without dragging the switch up off the floor. The other consideration is to ensure that the switch can be comfortably placed near your workstation and still be plugged into the power outlet. These parameters should determine the length of the extension lead you choose for your own switch. 

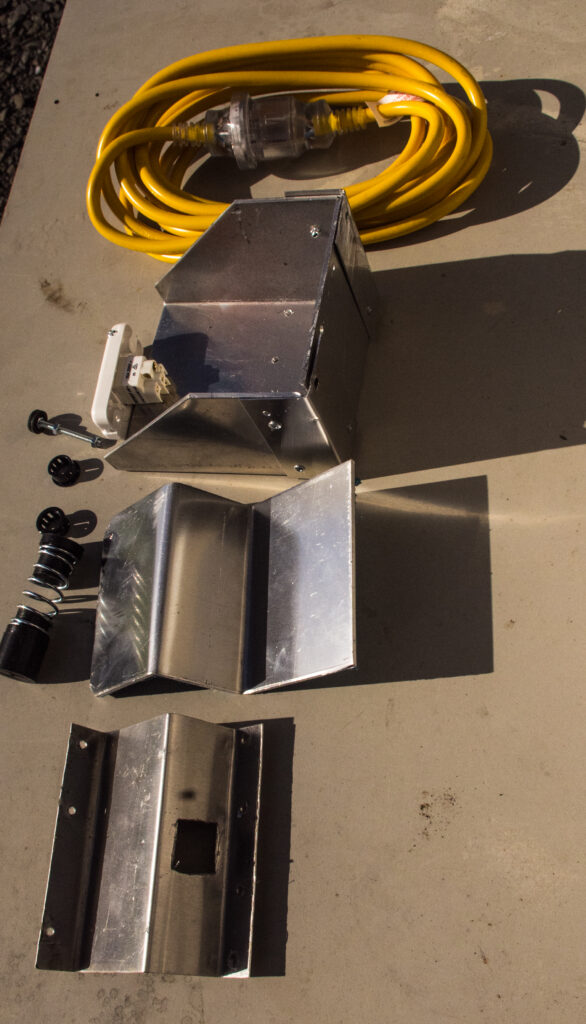
All the parts required for a the switch

Making the box
As I am fortunate enough to have access to scrap pieces of aluminium, I put my metal cutting and bending skills to the task of fabricating the box that will house the 10-amp, 250- volt bell press switch, which forms the heart of the unit. Using 3mm aluminium plate, I cut out and bent the various bits as per diagram 1.

To ensure that the switch always returns to the off position when my foot is retracted, I purchased a compression spring to install ahead of the bell press switch. The spring is kept in place on either end by nylon bushes turned up to suit it.
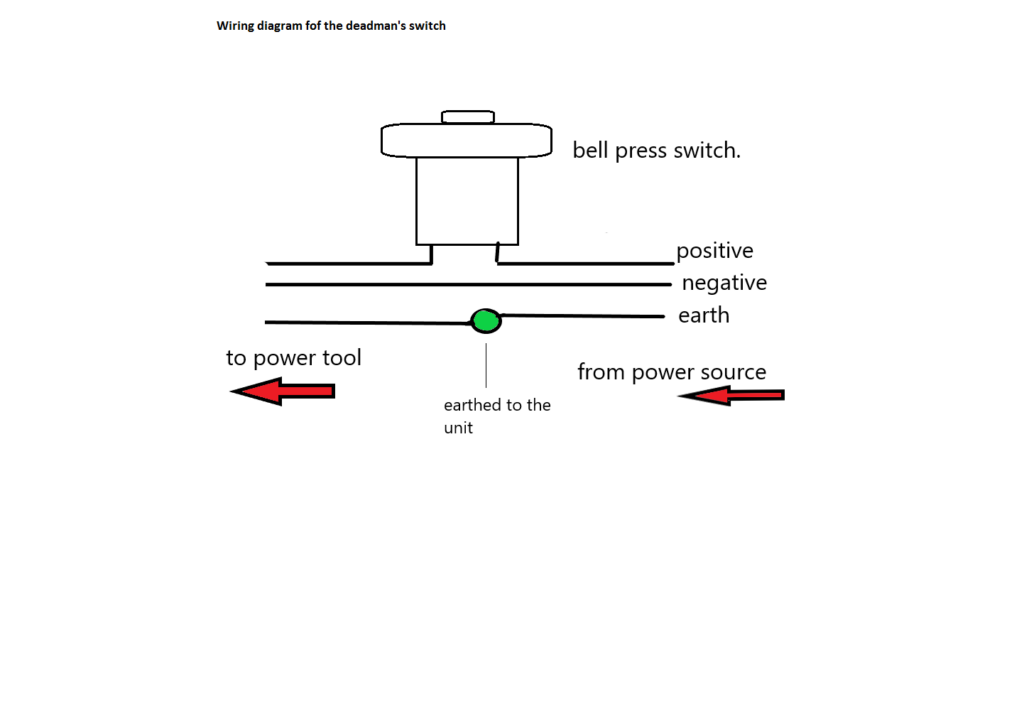
Having cut out and bent the aluminium to make the box, its paddle, and the support for the bell press switch, I wired it in according to diagram two.

Diagram 2. Wiring diagram

Share:

More Posts

The Shed September/October 2021 Issue 98 is on sale now

Glen Macmillan works between his two sheds creating sculptures from recycled waste. His junk of choice is gardening tools, landscaping equipment, and farming equipment — particularly the older kind of hand tools that were made to last and had a bit of styling.
Making a die nut

A die nut is created with interrupted sections of thread around its internal diameter. Die nuts are simply screwed onto the threaded part. As they are wound down, they cut away any of the screw thread that is bruised (bent over) or out of line. A die nut cuts irregularities and scrapes off the dirt from the thread it is being used on so needs cutting edges, which are formed by the cut-away places.