The old meths burner makes a comeback as a beer can stove
In my search on the Internet for alternative cooking appliances, I happened to stumble on this little gem made from two aluminium drink cans. It appears to be doing the rounds and there are many variations out there. I have adapted what I think is the best version, taking into consideration the raw materials available in New Zealand. I have also converted all measurements to metric. I first tried it out because I was honestly skeptical that it would work as efficiently as some claim it does. It took about 20 minutes to make and yes, it does work very, very well.
I am extremely impressed with the results. Once it was alight, I man- aged to boil 400mls of cold water in two and a half minutes. When you see the price of camping stoves in the shops, you realise what a huge saving this could be.
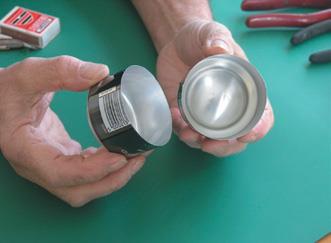
-
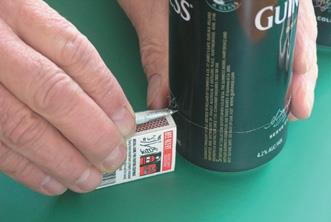
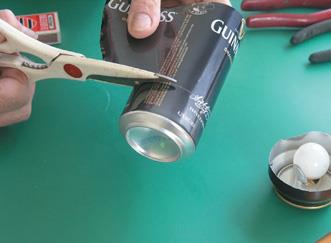
Scribe the bottom of the can around 30mm up. A matchbox comes in handy. 2. Kitchen scissors do the job. 3. The bases of two cut cans.
You need two empty aluminium cans. Either soft drink or beer cans will do. The narrow ones that some energy drinks come in are a tad on the small side for this project. Scribe a line completely around each can 30 mm up from the base. Cut along this line with an ordinary pair of scissors. The idea is that the bottom section of one can forms the base of your stove.
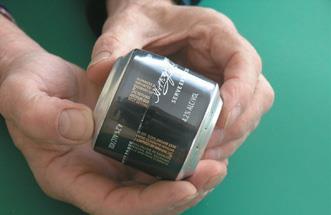
From the other can use the bottom section (because the top has a hole in it) and simply push it over the first base, forming a container. The base can needs to be crimped slightly to enable the top can to slide snugly over. I found that the tips of a pair of side cutters did this crimping nicely but make sure you do not actually cut the metal.
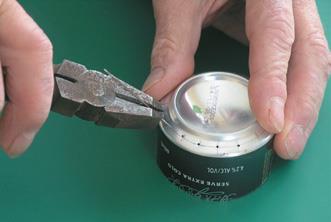
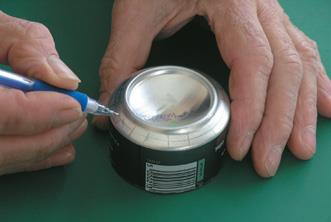
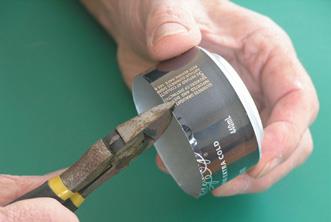
-
16 equally spaced points. 2. Pierce with needle. 3. Crimp one base to fit inside the other
On the base of one can, mark 16 equally spaced points with a pencil around the rim. Gently press the scriber point into the metal at each of these marks to make a locating point for your hole-forming “tool”.
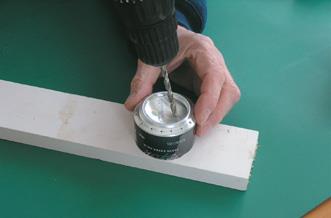
Using a darning needle in a pin chuck or suitable holder, carefully make 16 holes. These holes want to be about 0.5mm in diameter, but consistency is more important than actual dimensions. In the recessed surface of this can, drill a 6mm hole slightly off centre. This will form the filling hole. It is off-centre to allow for a small amount of fuel to remain in the central depression for initial lighting. Press the drilled top unit over the base unit and squeeze them together. This can be a bit tricky but it is worth spending time to get it right. I placed them in a wood vice and wound it in gently to get things even. Take care not to go too far.
-
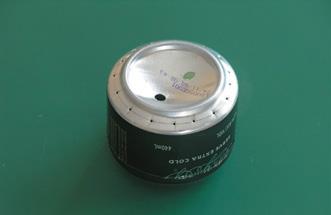
Drill filling hole off-centre. 2. Push can bases together. 3. The finished “stove”.
On the base of one can, mark 16 equally spaced points with a pencil around the rim. Gently press the scriber point into the metal at each of these marks to make a locating point for your hole-forming “tool”.
Using a darning needle in a pin chuck or suitable holder, carefully make 16 holes. These holes want to be about 0.5mm in diameter, but consistency is more important than actual dimensions. In the recessed surface of this can, drill a 6mm hole slightly off centre. This will form the filling hole. It is off-centre to allow for a small amount of fuel to remain in the central depression for initial lighting. Press the drilled top unit over the base unit and squeeze them together. This can be a bit tricky but it is worth spending time to get it right. I placed them in a wood vice and wound it in gently to get things even. Take care not to go too far.
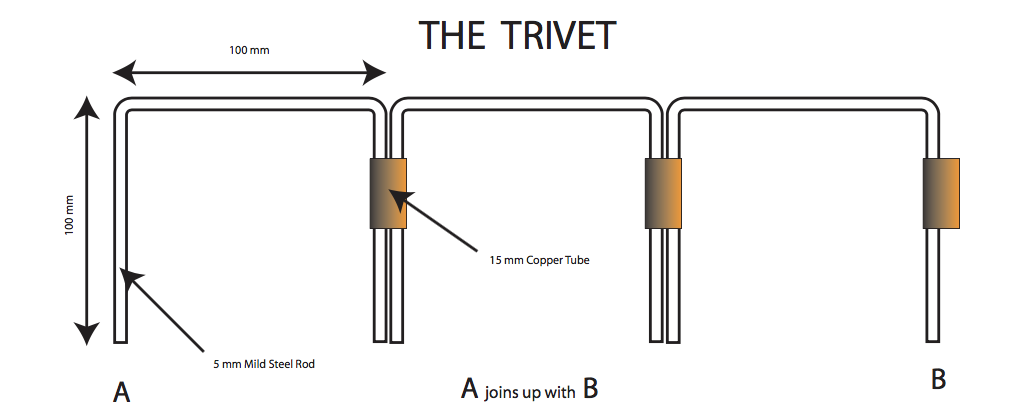
Support a cooking pot about 50 mm above the top of the stove by making a stable frame for it such as a trivet. I formed 5mm mild steel rods into U shapes hinged by 15m copper tubing. I held the legs in a vice to crimp the copper on. Bricks would do as a pot support and a windbreak feature would be an ingenious addition. Now sit back and wait until it boils. It really is that simple and truly one of the most efficient heating devices I have ever seen.
This is a great little project for a wet winter day and one you could do with the kids, though remember you are dealing with fire and it is NOT a toy. Give it a whirl…you’ll enjoy it. It is also a great addition to the household emergency kit that Civil Defence is always urging us to have. Last but not least, there is the warm glow you will acquire knowing that you are both recycling cans AND saving the planet from yet another disposable butane cylinder.