How to repair a thread

Damaged and pulled threads can be an annoying inconvenience, especially a stripped spark plug thread. They can also be expensive if the equipment you are working on is vital or difficult to replace. But there are now systems with which you can repair even completely destroyed threads quickly and at a reasonable cost, so saving time and money. Existing undamaged threads can also be significantly strengthened using these types of repair systems.

Resurrect your old mower by repairing the spark-plug cylinder thread
By Gavin Norrington,
Technical Manager, Patience & Nicholson 

The indestructible iron horse

Damaged and pulled threads can be an annoying inconvenience, especially a stripped spark plug thread. They can also be expensive if the equipment you are working on is vital or difficult to replace. But there are now systems with which you can repair even completely destroyed threads quickly and at a reasonable cost, so saving time and money.
Existing undamaged threads can also be significantly strengthened using these types of repair systems. This is especially helpful if you are making anything out of softer materials such as aluminum or brass. Most modern motor vehicles with aluminum sub-frames, engine components, and so on include thread inserts in their manufacture to increase fastening strength. Applications for this type of product are quite extensive. The aim of this article is to show you how to repair a thread in a couple of common situations many sheddies will have come across.
The first repair is one that anybody who services their own motor vehicle or power equipment such as lawnmowers at home would have been likely to have encountered, this stripped spark plug thread. There must be many valuable or otherwise useful pieces of equipment out there in shed land that could be put back into serviceable condition with this simple repair.
The second repair is a Keysert insert repair. This repair is used where the entire thread and surrounding parent material has failed. This repair is a little more complex but with care, it is still possible to carry out this type of repair with basic equipment found in the typical shed.

Tap with grease applied to catch swarf
Starting the re tapping by hand
Tapping the thread

Spark plug repair 
For this repair, we have chosen the classic old lawn mower with a damaged spark plug thread. Ideally, the engine would be stripped down to the cylinder barrel. But this repair can be successfully completed without doing this.
Most engineering merchants will stock or will be able to supply a spark plug repair kit of the correct size (either 10mm or 14mm) with everything included to complete the repair.
First of all, mount the mower on a bench in a convenient position, ideally in a vice with the spark plug hole pointing down vertically. This is to help prevent swarf from falling into the cylinder barrel. If this isn’t convenient, a good trick is to use grease on the end of the tap to collect all the swarf.
Next with the tap provided in the kit (you will need a tap wrench) carefully start cutting the new thread in your spark plug hole. Ensure the piston is at the bottom of its stroke. You will notice this tap has two different-sized threads on it. The first will match the original thread size in your spark-plug hole. The second is the thread for your insert to go into.
With the provided thread-insert tool, wind in the insert until it is flush with the top of the spark-plug hole. You may notice that when the insert was being wound in that its diameter reduced. This reduction in diameter creates a radial force that locks the insert in so that it cannot unwind once it is in place.
With a pair of long-nose pliers, break off tang or small metal lug used for purchase while you drive the insert in. Take care not to drop the tang into the cylinder. Carefully clean off any remaining swarf and grease.
You are now ready to refit your spark pug and fire up your resurrected lawn mower! Footnote: the brand of repair kit that has been used here uses stainless steel inserts, so this not only repairs the thread but strengthens it by up to 60 percent. 

Completed tap. Note the swarf captured by the grease
Thread repair ready for insertion
Inserting the thread
New insert in place. Note the drive tang
Snapping off the drive tang
Good as new!

Keysert repair
Fix an engine block head-stud hole

Drilling out the old thread

For the Keysert repair, we have again selected a common application which is an engine block with a torn-out head-stud hole.
This is a perfect type of repair for a Keysert. Keysert inserts come in many materials and different sizes for both internal and external diameters. Your local engineering merchant will know where to procure them.
Keyserts come in small quantity packs and do not include correct taps and drills. You will have to buy these as extras. 
For this repair, you will need to have your engine fully stripped down.
Lifting equipment, a sturdy bench, and a drill press are probably the order of the day for this operation.
Carefully drill out the hole to the required size and tap in the same way as the above.

Starting the tap
Tapping the hole

Screw in the Keysert until it is flush with the top of the hole. You will notice four square-shaped pins protruding from the top of the installed Keysert. These are locking pins.
With a ball pein hammer, carefully hammer these down until they are flush with the top of the hole.
You can now drill and tap the Keysert to the correct size for your stud and carry out any machining required. These are just two of the many repairs that can be carried out with these types of repair systems. Please refer to your local engineering merchant for further details on what is available.

Keysert nearly bedded
Knocking home the locking pins
The new thread tested for fit

Share:

More Posts

Metal and wood shelving

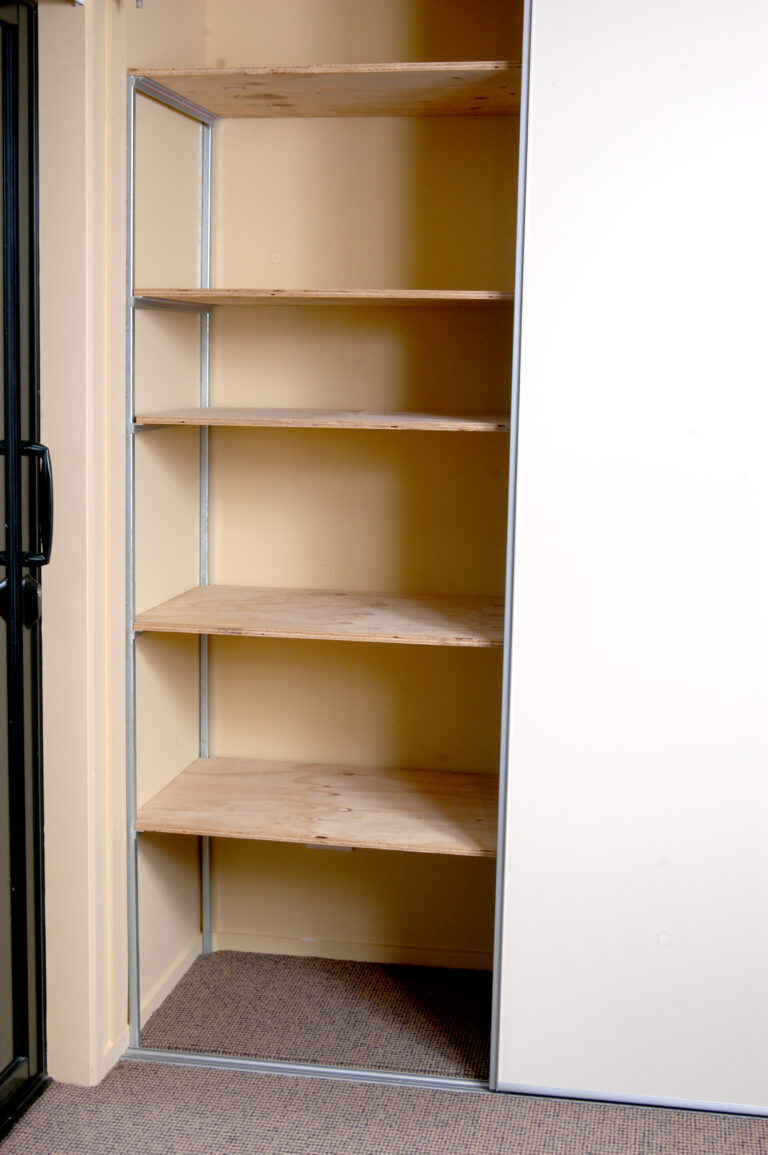
No matter how much storage space you have, there is always a need for more. One solution is to make better use of existing cupboards and wardrobes. In my own house the third bedroom is used as an office, so the built-in wardrobe was an obvious target for conversion into a storage place for files and computer supplies.
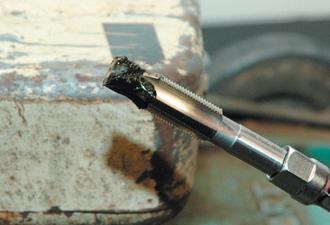
I had already tackled one shelving upgrade. We have a hallway cupboard used for many things that don’t have a place anywhere else, including toys for the grandchildren when they visit. The space was not used well. My solution was homemade shelving using frames of steel with plywood shelves.
For this cupboard, we had to allow for a basket of toys and chillibin on the floor level and picnic items and other bits and pieces on other levels. Once the shelves were installed, better use of space meant more room became available. One of Murphy’s Laws soon came into play and other items found their way into the open spaces, making good use of the variety of shelving.

A Legend Returns

A Legend Returns
A Historic Ferrari Monza 750 Joins the 2026 Ayrburn Classic Line-Up – 20-22 February 2026
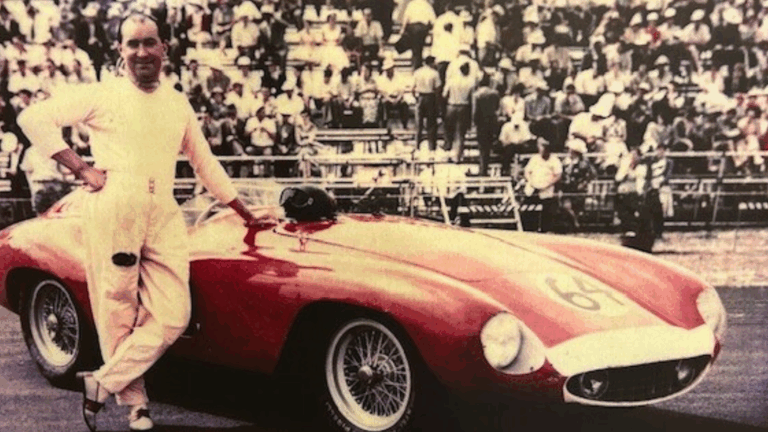
The Ayrburn Classic, one of the most anticipated motoring events on the New Zealand calendar, is set to take things up a gear in 2026 with a line-up that promises to captivate enthusiasts and the general public alike. Following the success of the inaugural event, the Ayrburn Classic returns with a recently confirmed feature that is nothing short of extraordinary: the historic Ferrari Monza 750 – a masterpiece of motorsport and one of the most significant vehicles to race on New Zealand soil.
Legendary status
This particular Ferrari Monza 750, which arrived in New Zealand in 1957 and has remained here ever since, holds a legendary status in motorsport history. It competed in the Mille Miglia, Le Mans, and the Targa Florio – the ‘Big Three’ of European endurance racing during the golden era of the sport. Few cars can claim such provenance, and even fewer have such a deep and poignant connection to New Zealand’s own racing legacy.
Tragically, the Ferrari Monza 750 was involved in a fatal accident at Ardmore in 1957, marking the final moments of British driver Ken Wharton, whose last photograph was taken next to this very car. The vehicle has since been meticulously preserved, with images from the aftermath of the crash etched in motorsport history. Today, it stands as a symbol of both the bravery of that era and the enduring beauty of Italian automotive craftsmanship.

Recreating history

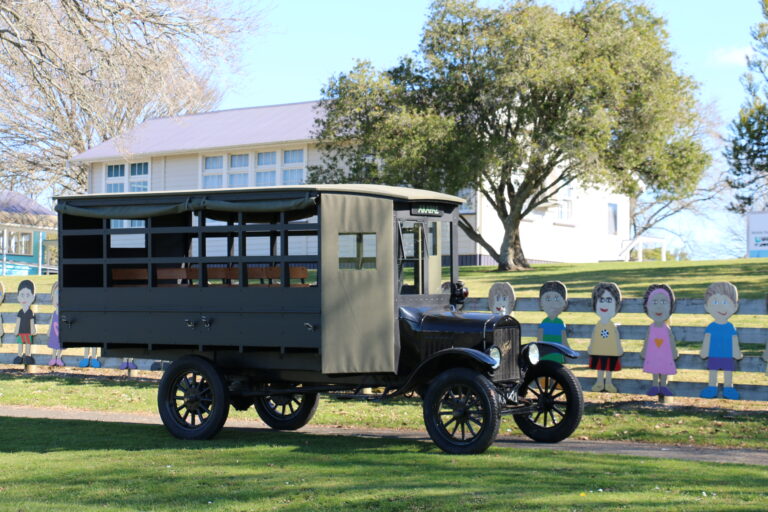
It seems the Phoenix Bus Company was well named, as like the phoenix bird of legend, the new bus has been reborn from the ashes of the old, so to speak.
A former principal of Piopio College, a local boat builder, and the whole community rallied around to recreate the Model T Ford bus, identical to its forebears.
It began when Brian Tegg, an ex-principal of Piopio College, found a 1921 Model T Ford restored transport truck for sale in Auckland and brought it on impulse three years ago.
Realising it was a unique opportunity to transform it into a bus, he got the Piopio College Trust and the local community behind the project.
Local fundraising by the Piopio College Trust, a Givealittle crowdfunding campaign, and support from many local people and businesses made the project happen.
Piopio is a small town of just 400 people but they have pride in their history.
Local boat builder Max Laver became involved in the project, transforming the truck into an exact copy of the early buses.