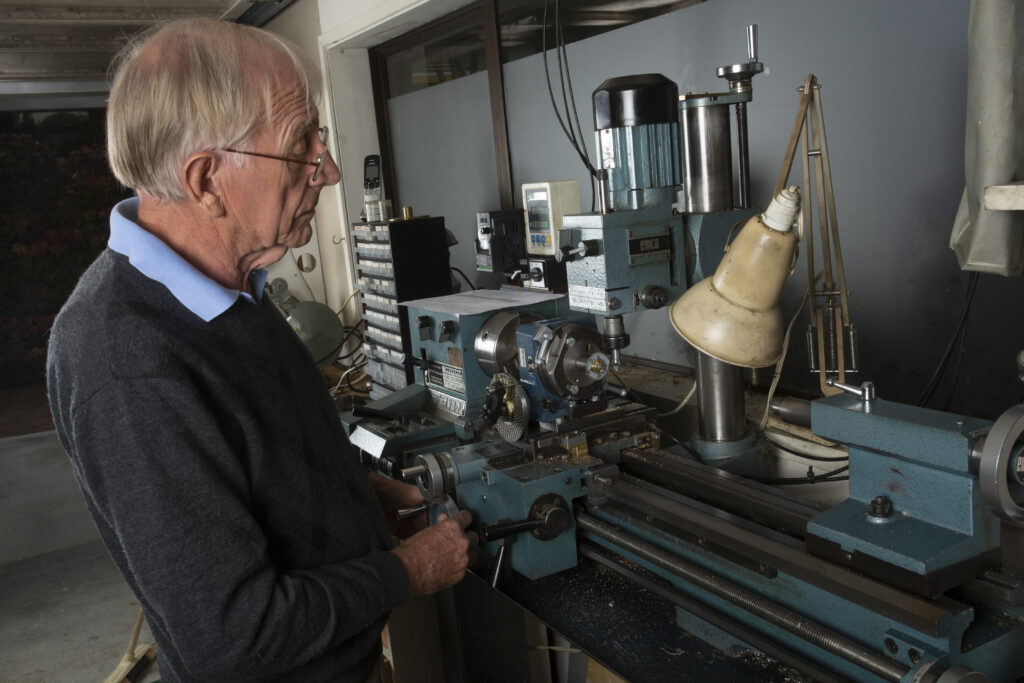
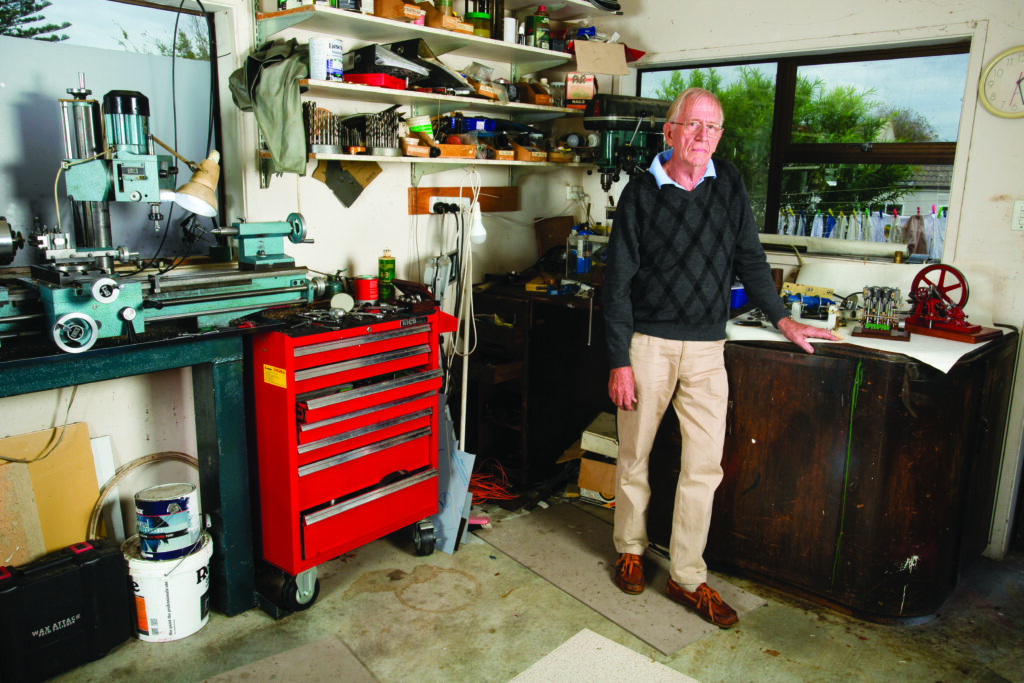
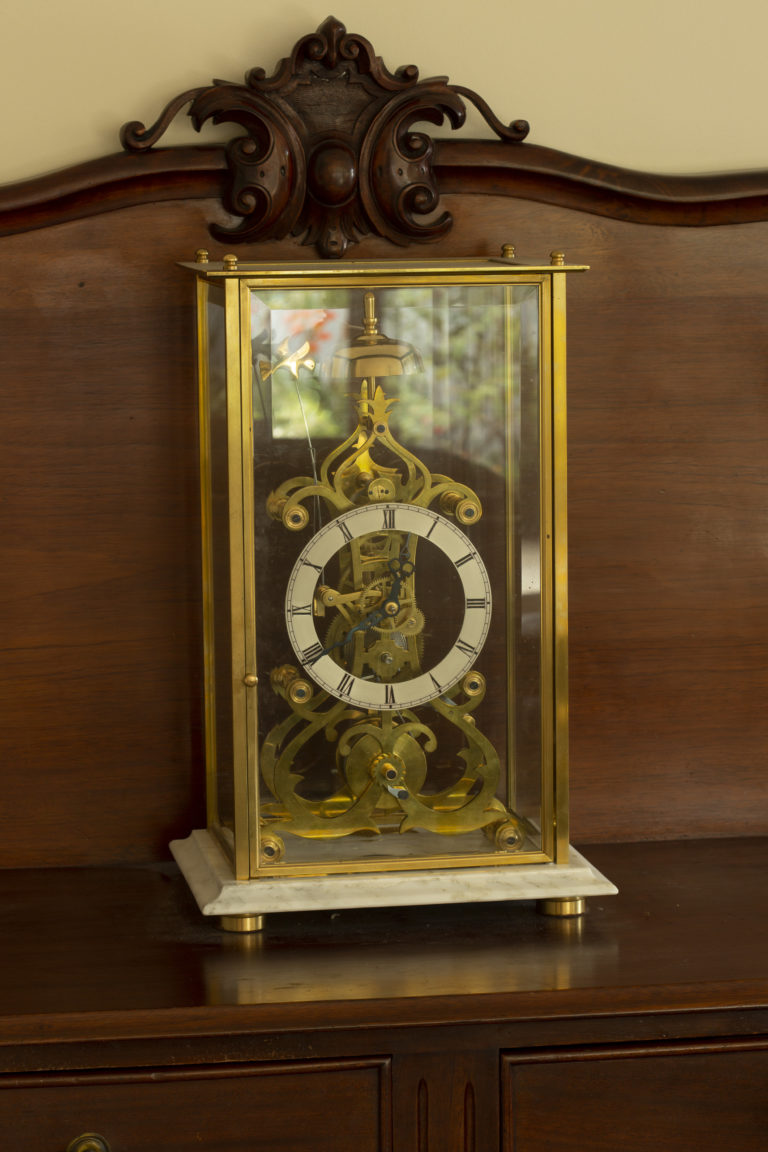
In pursuit of perfection

If David Curry was to be summed up in a single word it would almost certainly be precision. But that’s not enough – it would be absolutely vital to add artistry. Putting them together amounts to a search for perfection, so perhaps that’s the word to use. Here’s an example: David is at present building a dauntingly complicated perpetual calendar skeleton clock, which has 38 gears, one with 165 teeth, all of which have to be individually machined. Clearly precision is paramount. But the levers and some parts of the frame look a little utilitarian, so he’s redesigning them with a few artistic flourishes. For inspiration he looks to a skeleton clock built in 1855. “The engineering has to be right so that the parts work properly, but they also have to look right,” he says. The clock tells the time, has a second hand, notes the day, date and month, and knows whether the month has 30 or 31 days. David is adding a second chiming system so that the half hour, three-quarter hour and quarter hour chimes have different tones from the full hour strike.

Precision and artistry combine in the creation of a perpetual calendar skeleton clock
By Jon Addison
Photography: Adam Croy

David Curry in his workshop. His next project, a dauntingly complicated perpetual calendar skeleton clock

If David Curry were to be summed up in a single word, it would almost certainly be precision. But that’s not enough – it would be absolutely vital to add artistry. Putting them together amounts to a search for perfection, so perhaps that’s the word to use.
Here’s an example: David is at present building a dauntingly complicated perpetual calendar skeleton clock, which has 38 gears, one with 165 teeth, all of which have to be individually machined. Clearly, precision is paramount. But the levers and some parts of the frame look a little utilitarian, so he’s redesigning them with a few artistic flourishes. For inspiration, he looks to a skeleton clock built in 1855.
“The engineering has to be right so that the parts work properly, but they also have to look right,” he says.
The clock tells the time, has a second hand, notes the day, date and month, and knows whether the month has 30 or 31 days. David is adding a second chiming system so that the half-hour, three-quarter-hour, and quarter-hour chimes have different tones from the full-hour strike.

Skeleton-clock parts
The German digital display that David added to his lathe
A home-made cutting tool
A lamp that David made to project magnified images of gears
A disc and the cutter that will turn it into a gear wheel
The jig that David made to ensure perfect gear meshing

Making tools
Clock gear teeth can be pretty small, so David knocked up a little projector from a torch and a lens to enable him to project magnified images of the teeth to check that their shape is right. Although at a glance the teeth on a small clock gear may appear to be triangular in shape, in fact the form results from two arcs drawn from the gear centre, so the sides are gently curved.
Needless to say, the tooling to achieve this isn’t exactly simple. And while it’s possible to buy gear cutters for the larger gears, they are expensive, so David makes all his own from scratch.
“I probably spend as much time making the tools as I do making the clocks,” he reckons. “And making the tools is the most challenging part of the whole project.”
The four-tooth gear cutters are machined from flat-ground plate tool steel and then tempered. It takes considerable time to get the correct arc on the sides of the teeth. “They have to be visually correct as well as working properly,” David points out. “It took me two months of research to work out how to make them before I even started on the lathe.”
He has a dividing head to ensure that the teeth are perfectly spaced around each gear.

A gear wheel set up for the tooth cutter, with the dividing head at left
The home-made tooth cutter at work
A completed skeleton clock

Digital measuring system
He has also built what he calls a depthing tool, which has a pair of shafts culminating in fine points. The shafts can be adjusted together and apart. David fits a gear to each shaft and adjusts their engagement (or depth) until they mesh perfectly. Then he uses the points to mark the clock frame for the final shaft locations. “I’ve never seen one for sale.”
David bought his first lathe, a Myford ML7, in 1961 when he was just 16 years old. “It cost £110 but I was only earning £310 a year,” he remembers. The lathe in his Orakei, Auckland, workshop now is an Austrian-made EMCO Maximat V10, which was originally his father’s. It’s fitted with a small vertical mill. He has added a German-made digital display measuring system, accurate to five decimal places. That’s precision!
“I couldn’t work without it,” David says. As well as giving him the precision he requires, it also enables him to switch from Imperial to metric measurements at the touch of a button. Clock plans are invariably in Imperial, but he prefers to work in metric.
Most clocks have lantern pinions – the type that look like two discs with rods between them to engage the gear teeth. But David feels this is not elegant engineering, so machines tiny pinions from steel bar, using cutters he makes on his lathe.
Although precision is required in making the clock levers and frames, it’s achieved by painstakingly hand-sawing them from brass sheet and finishing each part by hand. A fretsaw with a wire-type blade is used for the cutting. The only parts of the clock that he doesn’t make from scratch are the main springs.

A selection of tools that David has made to machine clock parts
A gear-tooth cutting tool ready for work
Above: details of skeleton clocks give an idea of the patience required to build one

Restoring clocks 
David estimates it will take about 12 months to complete the perpetual calendar clock. “Once I’ve made all the tooling, it actually comes together quite quickly.”
It will be the second clock he’s built from scratch, but he’s also worked on or restored parts of old family heirloom clocks, including a pair of English grandfather clocks, one from 1680 and the other made in 1720. He says the 1680 clock probably came from a stately home as when it was made most houses still had dirt floors, so the clock cabinet feet rotted, but these are as original.
He’d worked on vintage cars, racing cars and had built model steam engines, and was scratching around looking for a new project when he spotted an article in The Shed magazine about building a skeleton clock.
His background in clock making goes back much further, though. 
“School bored me because I tended to believe what I could see with my own eyes so I left at 15 for a job at the post office workshops in Wellington, and started in the clock workshop,” he explains. “They had wind-up clocks in every post office in those days.
“However, after a few months, a watchmaker from Rahotu joined the workshop. It was suggested that wind-up clocks were becoming a thing of the past and I was transferred to the electrical instrument section.”
David says many of the post office staff had come through the Depression when they had to make do with whatever they could lay their hands on, and were very skilled and willing to pass on everything they knew. “They gave me the start-up skills, which I have continued.”
He then got a job at the DSIR physics engineering laboratory, where he made test equipment from the ground up for scientists and industry, which required mechanical and electronic skills.
It was a career that equipped him perfectly for his exacting hobbies later in life. And at 73 years old, he’s still learning.
See this video we made where David talks about his clock-making.

The inner working of a skeleton clock that David has made from scratch
David Curry in his home workshop

Steam Engines
A close look at the long bolts that clamp the heads onto the cylinders of David Curry’s model steam engines will reveal that they are machined with a slight taper towards the top: “They just look better that way,” he says.
He started building steam engines in 2014 when he inherited a partly built kitset from his father. After completing it, he decided he could do better, so made another four.
“The last one I made is an oscillating steam engine, something only a clockmaker could build,” David says. “I thought I wouldn’t be able to improve on it, so I haven’t made any more.”
Most of the little steam engines are models of real ones built for display at shows and can be “run” on compressed air, chuffing away just like the real thing.
David buys kits to get the major cast components, but machines all the other parts himself. All, that is, apart from the wooden bases, which are made for him by a friend. “I’m no good at woodwork.” 
The work is surprisingly demanding. For example, delicate 2mm diameter operating rods are machined from ¼ inch (6.35mm) square bar, so there are no joins at the square ends where they pivot. Such a fine piece is flexible in the lathe so requires a careful and experienced touch.
For the painted parts, David uses automotive spray cans, which can be supplied in practically any colour.
He also made a compound steam engine, in which steam is first expanded in one cylinder, then exhausted into a second cylinder to increase the energy that can be extracted and thus the efficiency of the engine. 
“Before I started it, I didn’t even know how a compound engine worked, so there was a bit of learning to do,” he says.

Pictured below
David’s collection of model steam engines shows the precision and workmanship in the huge variety of parts required

Vintage Cars
Plenty of sheddies work on or restore vintage and classic cars, but David Curry went a step further, designing and building a part he sold around the world.
The part was an electronic ignition system for V12 Jaguar and V8 Aston Martin engines from 1971 to 1981.
“In those days, most engines used mechanical contact breaker points, but they couldn’t keep up with the 600 sparks a second needed for the V12 at 6000 rpm,” David explains. “So Jaguar used an electronic ignition system, originally designed for the Cosworth Formula One engine, that wasn’t very reliable.”
So he developed a more modern system using the Hall effect pickup – essentially a magnetic pickup. These days such a system is commonplace, but David had to learn how to make and use nylon moulds to cast high- temperature epoxy fittings to locate the pickup in the distributor, and to develop parts such as an angled grommet to protect the output wiring so as to fit within the original mechanical componentry.
Soon afterwards the internet “changed my life” by providing a channel to market the ignition systems to Jaguar V12 owners all over the world. It became a successful small business until David tired of sitting at his workbench making the parts, assembling the units, and packaging them for dispatch.
His interest in cars has been lifelong – his father owned vintage cars and even had Bugatti parts in his garage. Along with the skills he learned at the post office he completed a panel beating course to prepare for restoration work.
David’s first car was a 1930s Riley 9 Kestrel. “I had to rebuild the wooden body. I owned a few 1930s Rileys, which were well balanced and nice to drive,” he recalls. “On their skinny tyres, they could go sideways everywhere.”
He graduated to a more advanced Alvis Speed 25, one of just three that come to New Zealand, and then to an Aston Martin DB4. He paid $5000 for that car and kept it so original it still had maps used by the first owner in the glovebox. 
Three E-Types followed, the first a very early model David didn’t like at all, then one of the last six-cylinder versions. Finally, he bought a V12 coupe, which he liked so much he kept it for 30 years.
He also flirted briefly with motor racing, restoring two Brabham BT18 single-seaters, one ex-Graeme Lawrence and the other ex-Roly Levis. David raced in classic events before selling the cars.
“I consider myself a very lucky individual,” he says. “My father took me to motor racing meetings, which aroused my interest, and I ended up owning cars I loved.”

David's red Aston Martin
The two Brabham BT18s that David restored
the ignition-system pickups and amplifier circuit board he made to fit 1970s V12 Jaguars and V8 Aston Martins

Silver Face
Polish that high-quality antique clock face too much, and it will soon be ruined as the silvery finish is a very thin coating over brass plate.
Many old clocks have faces printed on paper, but better ones have silvered brass faces, with the numerals, markings, and decorations hand-etched and filled with engraver’s wax.
The 1720 grandfather clock in David Curry’s living room originally had a silvered face, but it had been polished clean through the silvering. Some owners feel that’s a nice patina, he says, but there comes a point where patina turns into damage, and this clock was near that.
So David resorted to the silvering process used when the clock was first made and restored its face to its original state. The engraver’s wax, which is mixed with shellac, is quite durable, but if it is beyond salvage, it is still possible to buy the wax, which can be melted into the engravings after they have been completely cleaned. In David’s clock, the wax was as original.
The first step is to remove the damaged silvering, taking the face back to the brass using fine sandpaper. Great care has to be taken to remove as little material as possible because some of the fine engraving will be quite shallow. Once the brass is exposed, it has to be kept perfectly clean – a single finger mark can spoil the silvering.
The coating is achieved by first cleaning and then graining the dial, then rubbing the silvering powder, followed by a finishing powder, into the surface of the brass, washing away any excess. 
These days, many restorers will finish with a coat of clear lacquer to protect the silvering, which over time will bear the marks of fingers touching it during spring winding or other handling. With or without the lacquer the face needs just an occasional wipe – never a polish.

The Curry family Grove grandfather clock with restored face
The Curry family Grove grandfather clock's unrestored restored face

Share:

More Posts

A matter of time

I purchased all the brass sheet and rounds required, plus a main-spring, brass bolts, and screws of the various sizes needed.
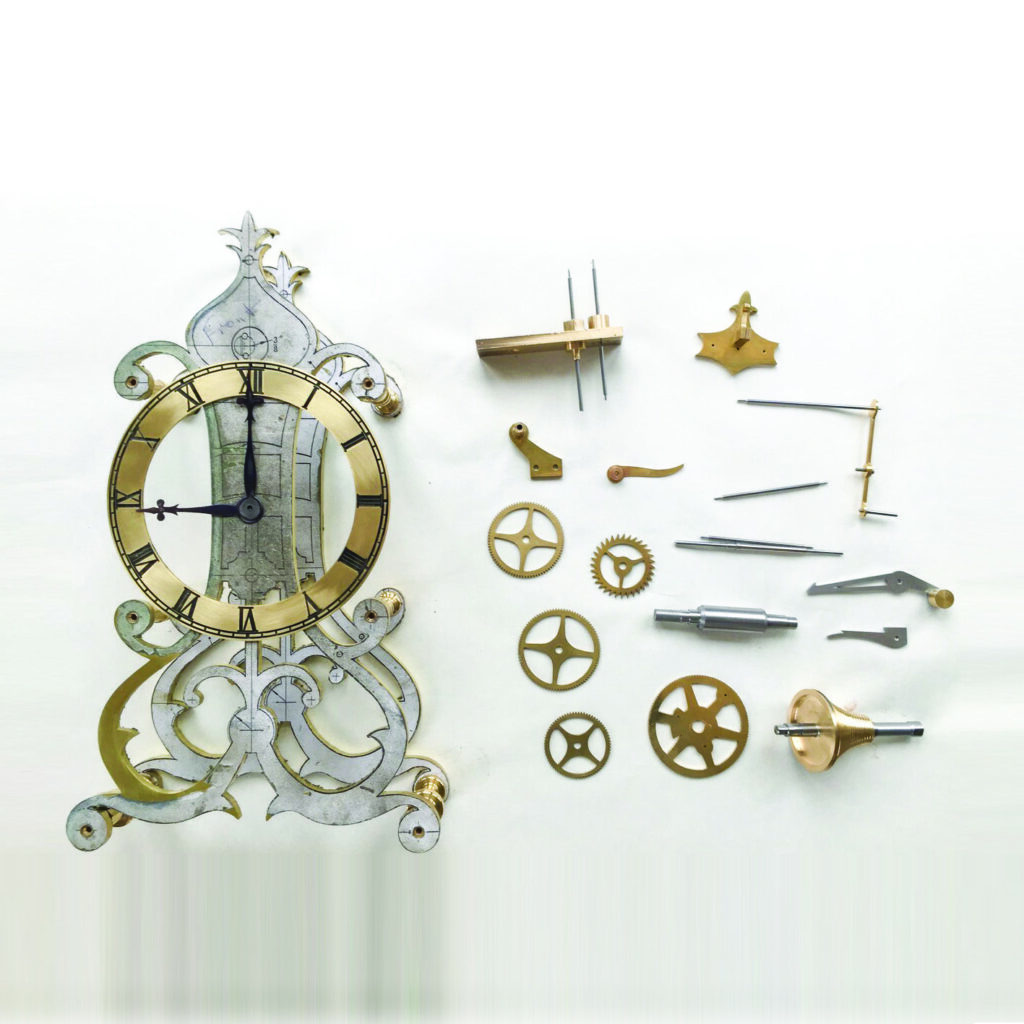
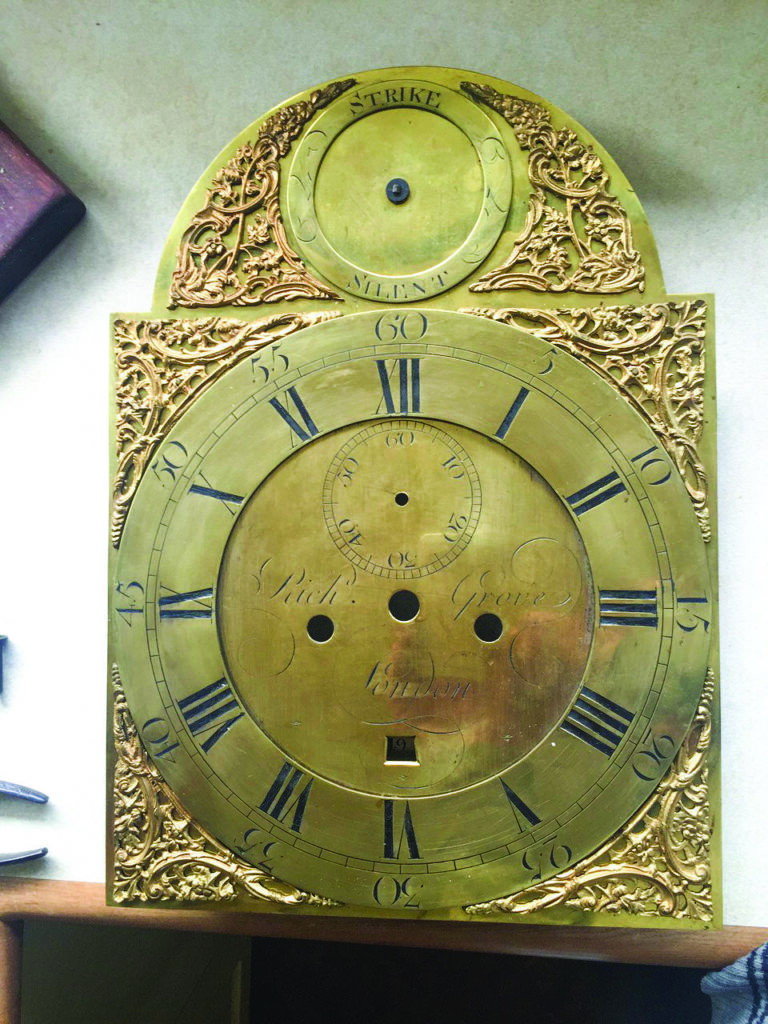
Now where to start on the clock?
I carefully read and followed the order and instructions of the book. If the instructions are not adhered to, many anxious moments and frustrations will follow.

Turning out a crescent clock

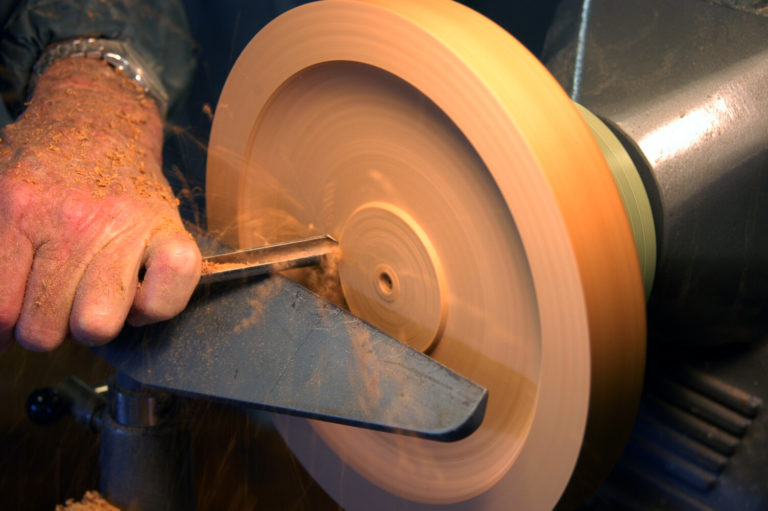
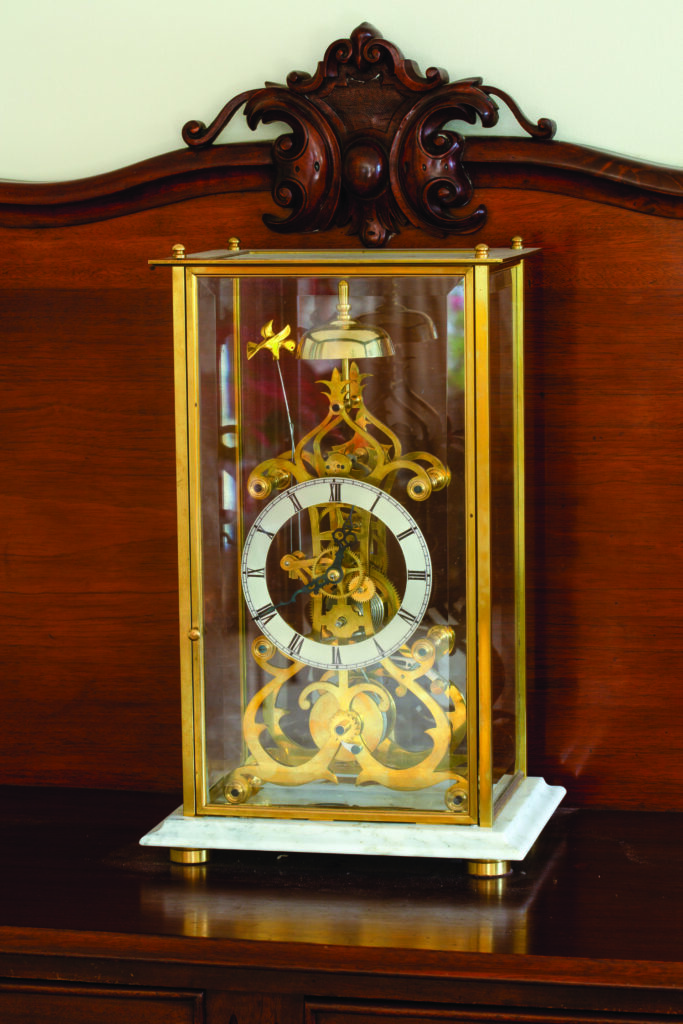
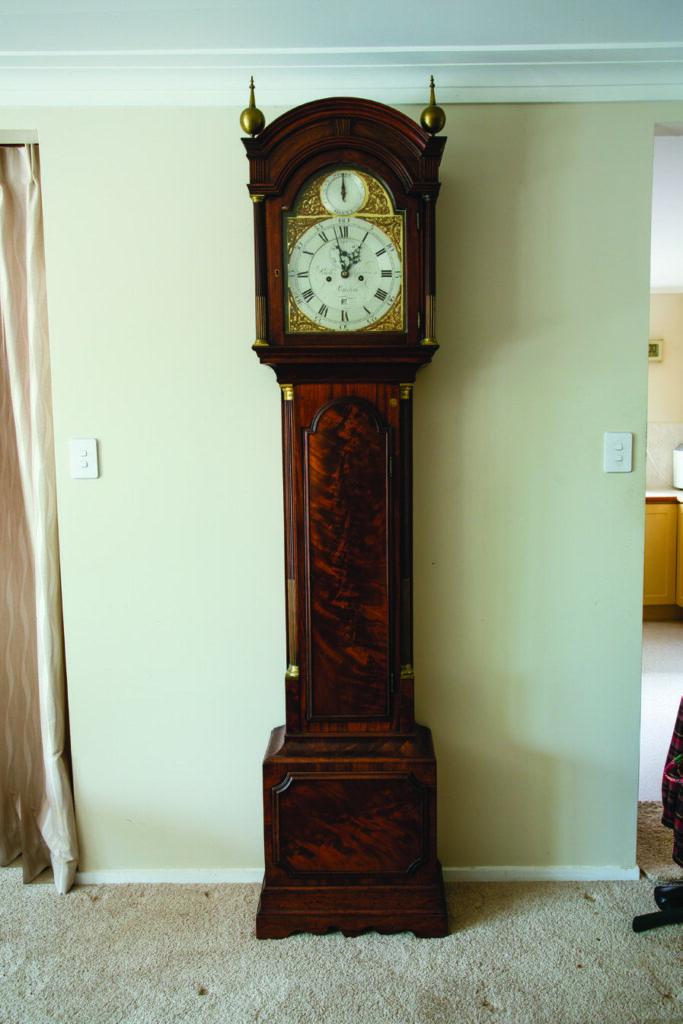
A crescent clock looks at its best if it is made from a stylish native timber.
For this project, I used a kauri block. When you come to select the wood which will be prominently on display in the living room or dining room, for preference choose a piece of timber that has a distinctive grain.