Ponoko—a cut above the rest

While laser cutters are now practical for home-build projects, they are not something that everyone will want to run. They take up bench space, need care and feeding, get expensive in large calibres, and if you don't use one that often you might well be better off letting a company like Wellington-based Ponoko cut things for you. Ponoko stock a wide range of materials and are experienced with using their laser cutters on them. Handy, but scarcely unique given the number of engineering outfits that are out there that'll do pretty much the same thing.

How you can get laser-cutting done
By Vik Olliver
Photographs Andrew Labett 

David Ten Have with the laser cutter at his international company Ponoko, based in Wellington

While laser cutters are practical home-build projects, they are not something that everyone will want to run. They take up bench space, need care and feeding, get expensive in large calibres, and if you don’t use one that often you might well be better off letting a company like Wellington-based Ponoko cut things for you.
Ponoko stock a wide range of materials and are experienced with using their laser cutters on them. Handy, but scarcely unique given the number of engineering outfits that are out there that’ll do pretty much the same thing.
But founder David Ten Have wasn’t out to create just another cutting shop when he started Ponoko in 2007. He had his sights on creating a factory, materials supplier and shop front all in one. Anyone could come onto the website and make designs that could be private one-offs, bought by other people, or handed out for free under permissive licences such as the Creative Commons one.
So how would it work for your typical Sheddie? Well, assuming you wanted to make something that wasn’t already up for grabs on Ponoko, you’d download some free software like Inkscape from ponoko.com, which comes with the Ponoko templates for the size of the item you want to cut. Then you consult the Ponoko guide for 2D printing.

Laser cutter at work
Three-dimensional laser-cut light shade

Design
The basic procedure is: Draw your parts using Inkscape in different coloured lines, which the laser will follow just as if you’d printed it on paper—and that’s a good way of checking everything is the right size, incidentally. Blue lines get cut right through, magenta lines are lightly etched, green lines are singed more generously, and red lines are well done.
This engraving ability lets you etch assembly instructions or dimensions onto your parts, or your e-mail address etc. You are charged per minute of laser-cutting time, so you want to make sure you only go along a line once. Putting two lines on top of each other looks the same as one line on your screen and printout, but the laser will cut twice and you will be charged twice. Ponoko have a bunch of hints online to minimise this. Engraving takes much less time than cutting, so don’t be shy about using it.

Gears designed in Inkscape

Upload
Eventually, you may become satisfied with your design. At this point you actually need a Ponoko account. There’s a free one for occasional users and one that charges a monthly fee with discounts for those who do regular cutting. Either way, you upload the template to Ponoko, pick the material you’d like, and hit the “Go” button.
All being well, Ponoko then pop a sheet of your chosen plastic, wood, metal, leather etc. under the laser cutter, in one of the following sizes: 181 x 181 mm, 384 x 384 mm, 790 x 384 mm.
Lasers burn, smoke is generated, robotic equipment grinds and whizzes away, and your masterpiece is created. Then Ponoko slap a big sheet of sticky paper on top to hold all the bits together, pop it in a flat-pack box and send it out to you.

Laser-cut leather purse

Upload
Eventually, you may become satisfied with your design. At this point you actually need a Ponoko account. There’s a free one for occasional users and one that charges a monthly fee with discounts for those who do regular cutting. Either way, you upload the template to Ponoko, pick the material you’d like, and hit the “Go” button.
All being well, Ponoko then pop a sheet of your chosen plastic, wood, metal, leather etc. under the laser cutter, in one of the following sizes: 181 x 181 mm, 384 x 384 mm, 790 x 384 mm.
Lasers burn, smoke is generated, robotic equipment grinds and whizzes away, and your masterpiece is created. Then Ponoko slap a big sheet of sticky paper on top to hold all the bits together, pop it in a flat-pack box and send it out to you.

Coaster pattern cut by laser

Shop front
But instead of laboriously doing this manufacturing yourself, you can just as easily put your object up for sale in Ponoko’s free shop front, and let other people all around the world pay to use it. Or just give it away free if you’re feeling altruistic. Some designs really bend what is possible, such as the concept of cutting plywood with a laser to make it foldable and flexible. Brian Chan even went as far as creating a laser-cut, folding ukulele(See below and also see http://tinyurl.com/ponoko-ukulele).
If your design is beyond your personal capabilities, Ponoko host an open forum where you can request that other freelancers like Brian design it for you. Of course, they’ll want a cut. Ahah, ahah. Ponoko also occasionally host on-line seminars (“Webinars”) showing you how to use packages like Autocad123D.
The author creates his design files in SVG format using a range of free programs. This is an “Open” format that is used by a great many competing systems, can be relied upon to be stable and can be readily converted to other systems. Even years down the line, you’ll still be able to find software that will open your design and use it without complaining of old versions etc.

Model plane in the style of a P-38 Lightning
Wine rack

Kiwi start
Ponoko started off in Wellington where it has roughly half of its 12 employees and one of its laser cutters. It has since spread to the United States where it has another couple of laser cutters and alliances with some very interesting partners: Sparkfun, Arduino and so on. These aren’t directly available from New Zealand, though there are local stockists of Sparkfun gear such as Mindkits.
It is very interesting that David seeks to combine the fabrication process with the availability of electronic and mechanical components so that one can produce an entire kit and put it for sale online without holding any stock oneself.
I asked David what his favourite Ponoko item was. He replied that this was a bit like asking a father which was his favourite child, but he says he enjoyed helping make the RepRap 3D printer: “I got a huge kick from making that happen. There was something delightfully meta about the whole exercise.” No surprise then that Ponoko also do 3D printing but that, as they say, is another story.

David with examples aplenty

Folding ukulele
MIT graduate and Massachusetts-based origami expert Brian Chan used laser-cut bamboo plywood to create a folding ukulele from multiple flat pieces that are made up into a three-dimensional instrument. It is a soprano-like ukulele, approximately 330 mm long, and 241 mm long folded. Brian Chan writes:
“I enjoy learning musical instruments but often must travel. The need to travel light clashes with my desire to bring instruments along to practice. Inspired by sci-fi animé, I began designing instruments that can transform into a much smaller form for portability.
“One of the great things about stringed musical instruments is that they are composed mainly of empty space, theoretically allowing for a high compression ratio. This was not intended as a concert instrument but more as an instrument for road trips and emergency music-making. The tone is sweet but about half as loud as a similar soprano ukulele, due to the material.
“For my first production model, I decided to design a folding ukulele, for several reasons. First, the ukulele is the kind of instrument you would bring almost everywhere. Secondly, because the ukulele has only four strings at low tension, it is less likely to bend too much and easier to string (its compact folded form needs to be unstrung and this results in the smallest package; restringing and retuning takes just a few minutes).
“I also feel that a new-fangled folding instrument will be less likely to invoke the disapproval of strict traditionalists, which is always just plain silly. Unlike my previous folding and non-folding instruments, I designed this one to be cut almost 99 percent out of laser-cut bamboo plywood so that it could be made into a production item rather than a one-off.
“This necessitated a polygonal design; to further simplify the design and construction, I use only right-angle and 120 degree joints. These simplifications led to a form based on the hexagon which is one the most beautiful of the polygons.
“I wanted to be economical so I had to be creative in certain parts. For example, instead of using fretwire, the frets are formed from staggered “steps” set at an angle. Like many first projects, I expect this instrument to evolve and give rise to other, perhaps more foldable instruments.”
Brian Chan is also known as chosetec, the name under which he is represented with his designs on the Ponoko website. The kit is available for purchase online at: http://ponoko.com/showroom/chosetec

The back lifts off and the unstrung ukulele folds inside itself
The production model shown is made from bamboo plywood
The head of the instrument is modelled like that of a violin
The folded instrument measures about 9.5 inches (241 mm) long
There are no wire frets but staggered “steps” at an angle in the wood
The laser-cut bamboo is etched with the maker's mark

Share:

More Posts

On the move

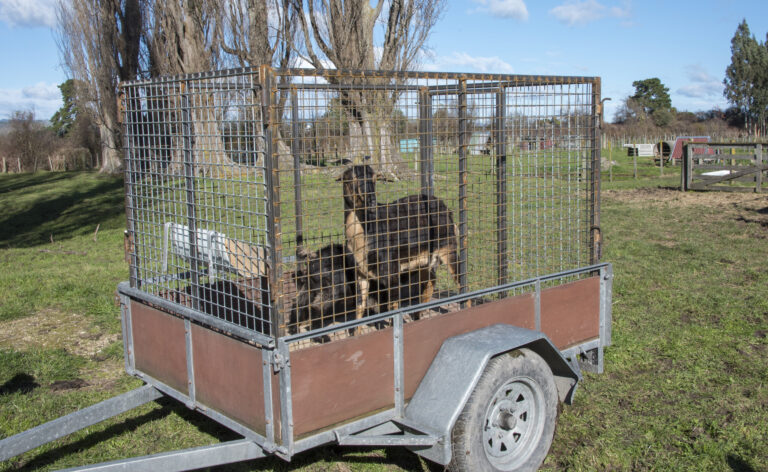
Farm life, even on a pocket-handkerchief farm like mine, means that you will need to move stock from time to time. I run a few cattle beasts and a few goats. I plan to get a few sheep soon, too. The issue with stock is moving them. Moving the cattle is a different story but for the smaller stock I could carry them either on the tray of my ute or my trailer if either had a stock cage.
I decided that building a cage could be an easily achievable project and so it has proved. It has value even if you don’t have stock – it certainly increases the options for your trailer. It is a lot easier collecting firewood with a cage, even transporting rubbish, or green waste. In the case of the latter you might want to make the end hinged rather than incorporate a gate to make it easier to unload the waste.

My shed the barn

Capacity is always the issue. My two sheds at home were each at their limit. I had woodwork in one and a one-off car suffering fabrication right on top of it in another.
When it came time to plan a new house on the new section, I thought of a barn-sized shed. In this barn, I would build all the joinery for the house. But first I had to build the barn.
I had a design that had been kicked around for ages and required a giant leap forward in capacity. This barn as my workshop would have good height, tall openings, a range of areas for different tasks and that all-important swing room around the main machine, a multi-function dimension saw.
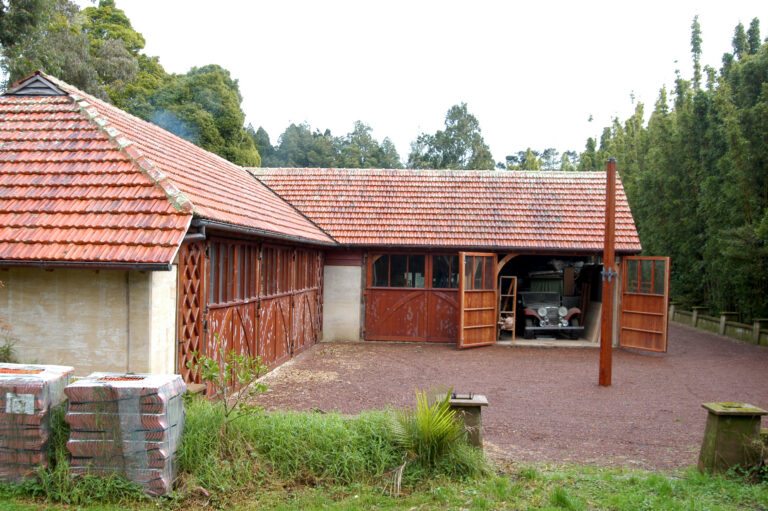
Like other glimpses I enjoy of by-gone eras, I have always loved those English “oak barns” typically housing Aston Martins in magazines portraying classic cars. The vision I had for my barn was of posts and beams and the roof crouching over long flanks, suggesting back rooms filled with the rare and the useful.

A life in harmony

There is such a thing as serendipity. When Paul Downie was 11 years old a chance meeting at his grandmother’s house was to eventually set him on a course that would define his career.
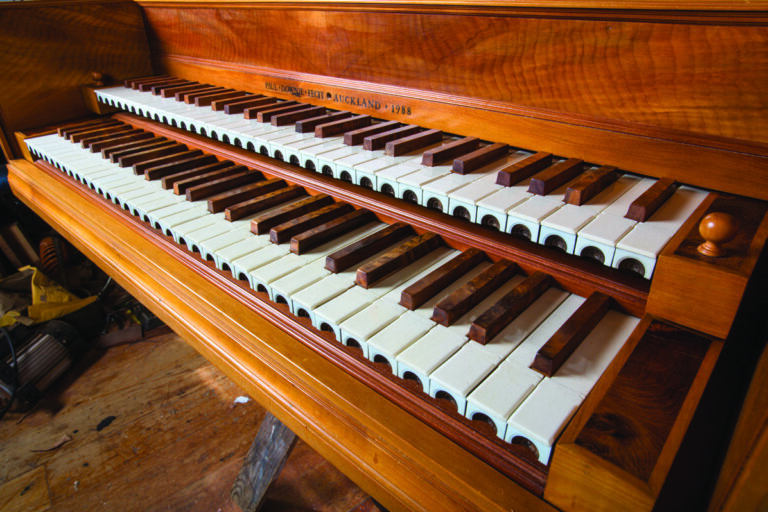
“I was learning the piano at the time and her friend had a harpsichord that he invited me over to see. I thought it was marvellous,” he recalls. “He told me I should build one and although it sounded like a ridiculous idea, it never went away.”
When he was 22, Paul embarked on the project, researching how to build a harpsichord, scouring junk shops for old tools, sawing bits of wood, and gluing them up until he had constructed the instrument.
“I enjoyed the whole process so much that when I was 23 I decided to build another one. I discovered that overseas museums had very detailed technical drawings of old instruments which you could buy – when they are restored everything about the instrument and the mechanisms are recorded.
“I went on to build two more harpsichords. The first one did work but it wasn’t up to the same standard so I ended up pulling it apart and my sister burnt it as fire wood,” he says laughing. “The others have survived and are owned by very good musicians.”